
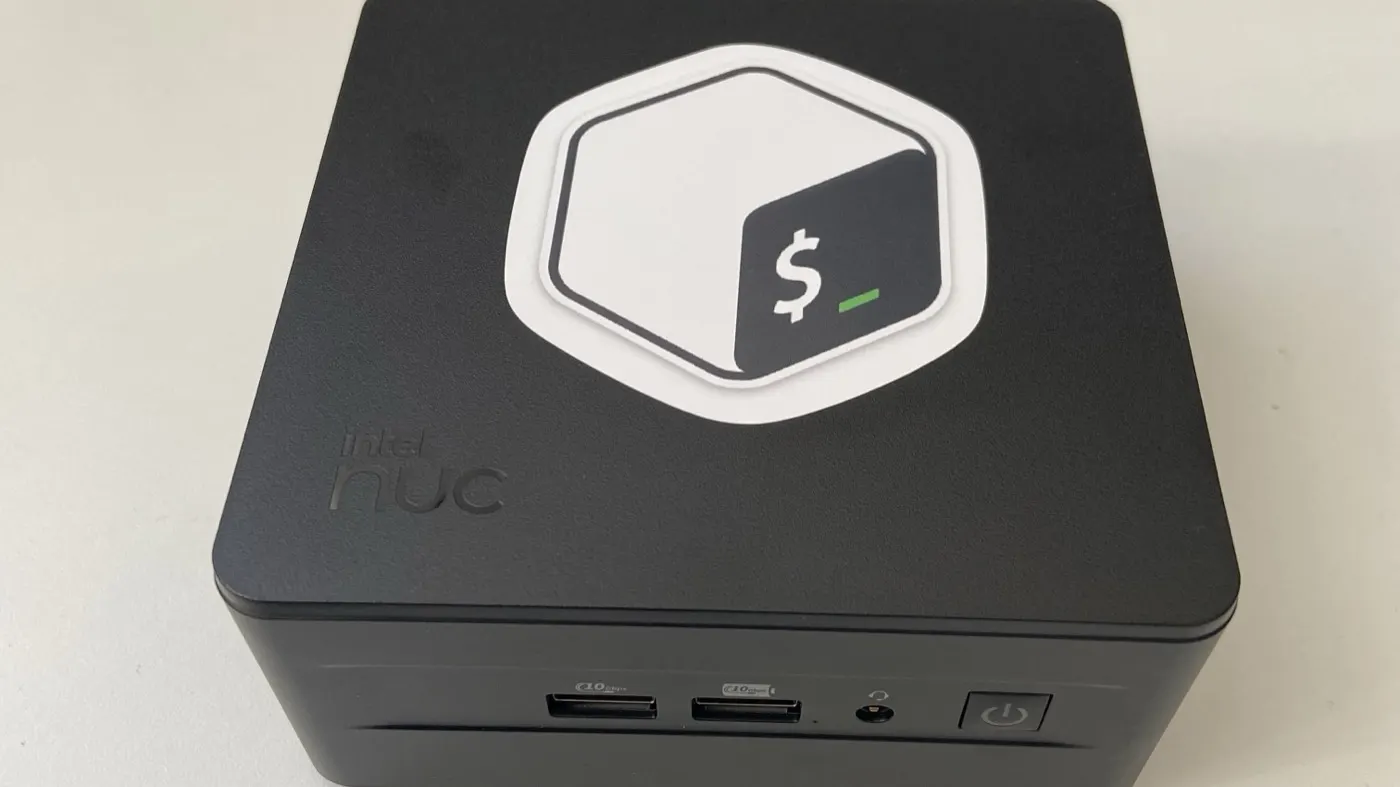
Most of Code To Cloud's work runs on Azure. Plenty of the teams I talk to also run their critical systems on premises, on Red Hat Enterprise Linux (RHEL), patched with Ansible and increasingly hosted on OpenShift. To be useful to those teams I need hands-on time with the same tools, so I built a RHEL 10 lab.
This post covers everything from a blank mini PC to a patched server I reach only over SSH: the hardware, the USB stick, the install, the static IP, registration, updates, and the hardening I still have to do. Every command here was run on this machine, and the output in the screenshots is real. Addresses and names are swapped for generic ones.
What's Inside
- The hardware, and how the lab fits together
- Getting the RHEL ISO with a free Red Hat Developer account
- Writing the USB stick with Rufus, and what to do if the installer can't find its packages
- The install choices worth knowing about
- A static IP with nmcli, now that RHEL 10 has dropped ifcfg files
- Going headless: SSH keys and the Cockpit web console
- Registering with an activation key, updating, and rebooting
- A hardening checklist: what's done and what's next
The Hardware
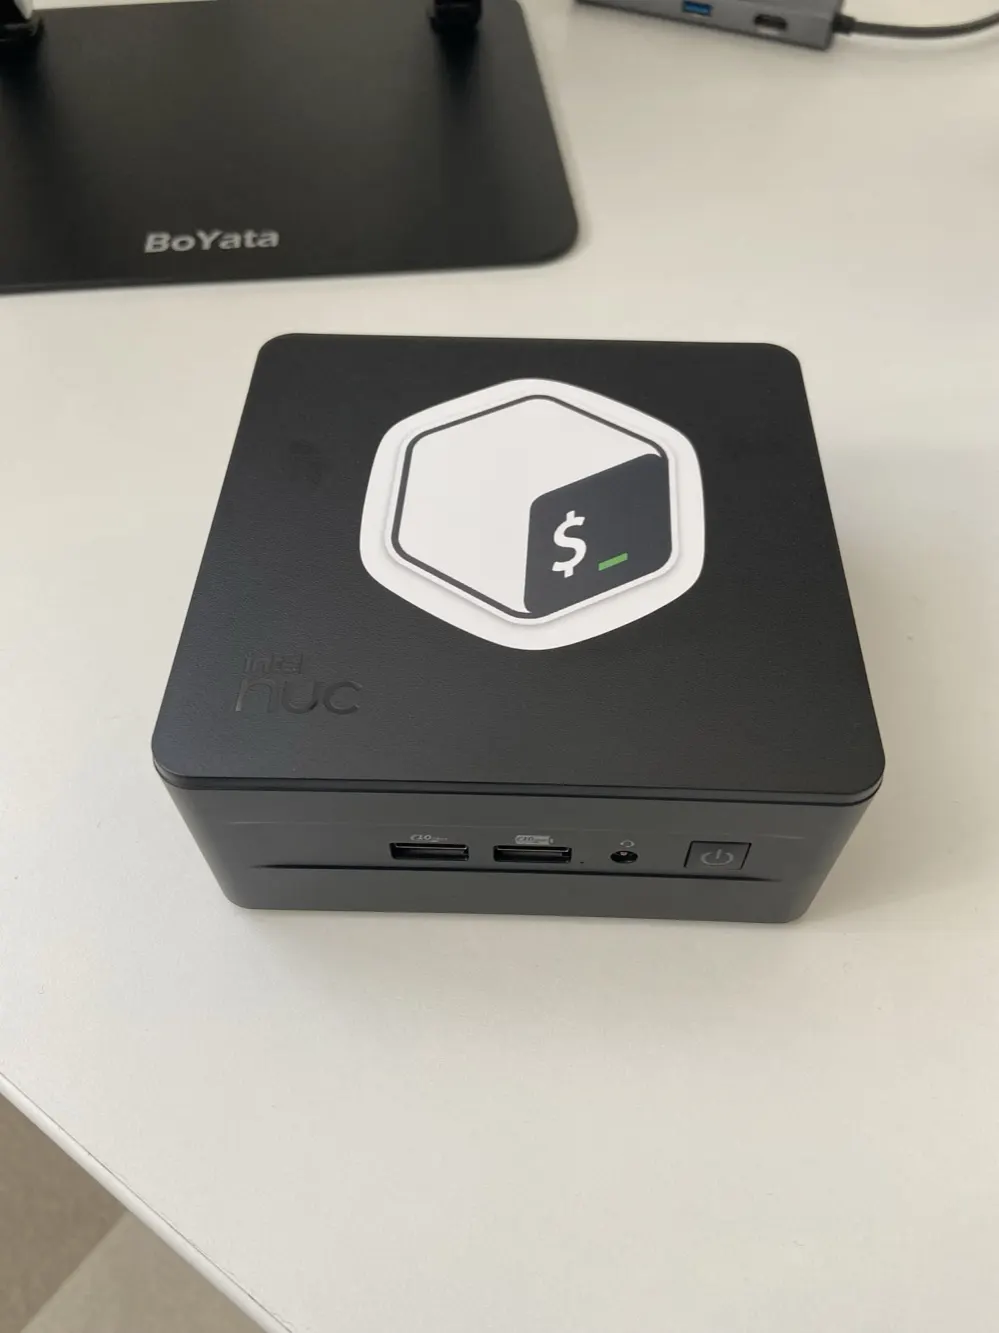
The lab is a single Intel NUC 13 Pro (model NUC13ANHi7). It's small enough to sit on a desk, and it has enough memory to run several virtual machines at once.
| Part | What's in it |
|---|---|
| CPU | Intel Core i7-1360P: 12 cores, 16 threads |
| Memory | 64 GB DDR4-3200 (2 x 32 GB) |
| Storage | 1 TB Kingston NV2 NVMe SSD |
| Network | Intel I226-V 2.5 GbE port, onboard Intel Wi-Fi, plus a TP-Link USB Wi-Fi adapter |
| Firmware | UEFI, with Secure Boot turned on |
It's connected over Wi-Fi for now. That matters later, when it comes to networking the virtual machines.
How the Lab Fits Together
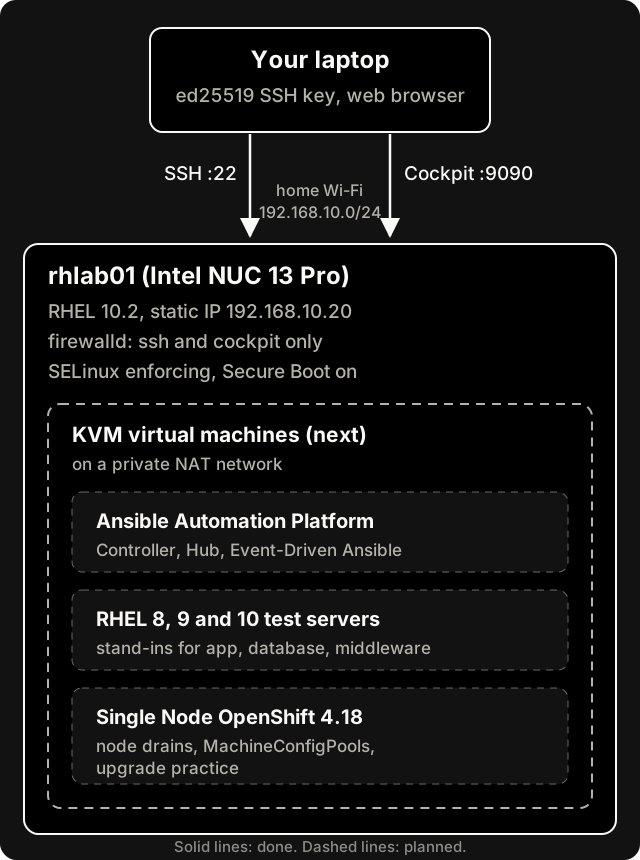
The NUC runs RHEL 10.2 with a fixed address on my home network. I connect to it from my laptop with SSH, and I manage it in a browser with Cockpit. Next, it becomes a KVM host for virtual machines running Ansible Automation Platform (AAP), a few RHEL test servers, and Single Node OpenShift.
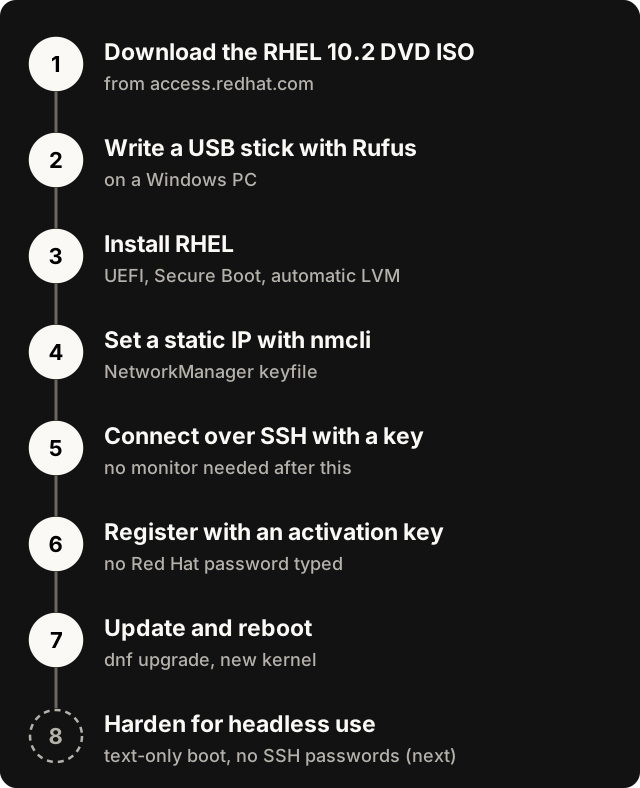
Here is the whole build in order:
Step 1: Get the RHEL ISO
Code To Cloud already had a Red Hat account, so I used that. For a lab of your own, the free Red Hat Developer Subscription for Individuals is the way in. According to Red Hat's FAQ, it:
- covers RHEL on up to 16 physical or virtual systems,
- is self-supported, with no support SLA,
- allows development, testing and small production use,
- is for individuals only, one per Red Hat account, not companies or teams.
To sign up:
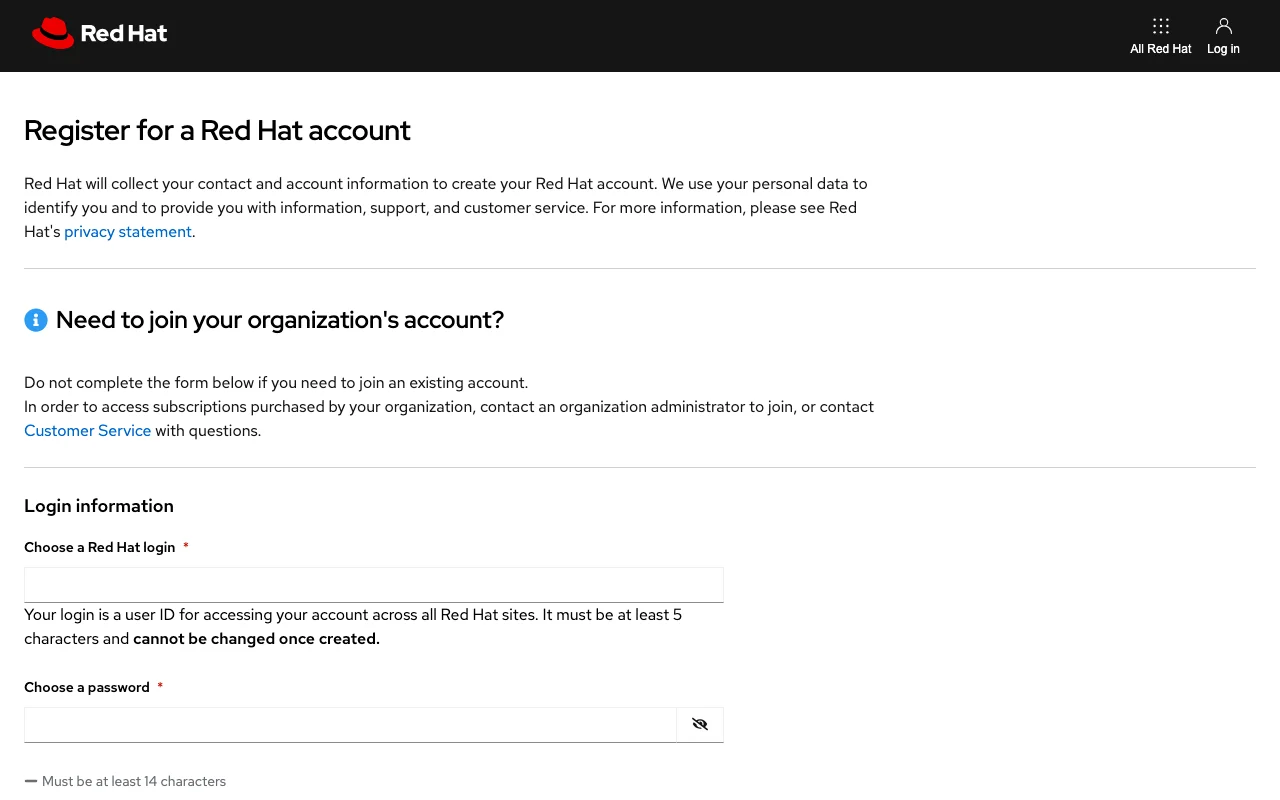
- Go to developers.redhat.com/register.
- Choose your login carefully. It must be at least 5 characters and can't be changed later. The password must be at least 14 characters.
- Fill in the rest of the form, accept the terms, and confirm your email address.
- The subscription is added to your account automatically. Check it under Subscriptions at access.redhat.com/management.
Two things to watch for:
- Joining your company's account? The page tells you not to fill in the form. Ask an admin of your organization's Red Hat account to add you instead.
- The subscription lasts one year. You renew it at no cost, from 30 days before it expires, by following Red Hat's renewal steps.
Then download the ISO from the Red Hat product downloads page. Red Hat offers two installers:
- The DVD ISO includes the BaseOS and AppStream package repositories, so the install doesn't need an internet connection. This is the one I used.
- The Boot ISO is much smaller and pulls packages from Red Hat during the install.
The download page lists a SHA-256 checksum for each ISO. On Windows, check yours in PowerShell before you write it anywhere:
Get-FileHash .\<your-rhel-iso>.iso -Algorithm SHA256
Step 2: Write the USB Stick With Rufus
I wrote the USB stick on a Windows PC with Rufus, a free, open-source tool. At the time of writing the current release is 4.15, it needs Windows 8 or later, and there's a portable version that runs without installing.
- Plug in a USB stick. Red Hat recommends at least 16 GB. Everything on it will be erased.
- Open Rufus and pick the stick under Device.
- Click SELECT and choose the RHEL ISO.
- Leave the partition scheme and target system as Rufus sets them for the ISO.
- Click START. For Linux ISOs like this one, Rufus asks whether to write in ISO image mode or DD image mode. Rufus recommends ISO mode.
Two things worth knowing before you start:
- Red Hat's documentation doesn't use Rufus. Its RHEL 10 installation guide recommends Fedora Media Writer on Windows, and notes that it's a community tool Red Hat doesn't support. Rufus worked for me: the stick booted, and the installer used it as its package source.
- If the installer can't find its own packages, which shows up as only the Red Hat CDN being offered as an installation source, there are two documented fixes. Red Hat's known issues cover USB sticks made with third-party tools: edit the boot entry at the installer menu (press e on a UEFI machine like this one) and change
inst.stage2=toinst.repo=. Red Hat's knowledge base also suggests rewriting the stick in Rufus's DD image mode.
Don't copy the ISO file onto a USB stick in File Explorer. The stick won't boot.
Step 3: Install RHEL
Plug the stick into the NUC, power it on, and press F10 to get the boot menu. Then choose the USB stick.
The installer saves your choices in /root/anaconda-ks.cfg, which made it easy to check what I'd actually picked:
| Setting | What I chose | Worth knowing |
|---|---|---|
| Software | Server with GUI | It installs Cockpit and opens it in the firewall. Fine for a lab, even though the server will run without a screen. |
| Disk | Automatic partitioning | It created LVM with 70 GB for /, 31 GB of swap, and 828 GB for /home. VM disks go in /var/lib/libvirt/images by default, which is on the 70 GB /, so I'll put them on /home. |
| Firmware | UEFI with Secure Boot on | RHEL's bootloader is signed, so Secure Boot can stay on. |
| kdump | Enabled (the default) | It reserves memory to capture a crash dump if the kernel crashes. |
| Time zone | America/Winnipeg | A mistake. I'm in Calgary, so it should be America/Edmonton. It's a one-line fix, covered in the checklist below. |
Step 4: Give It a Static IP
A server you connect to by address needs an address that doesn't change. There are two ways to get one:
- A DHCP reservation on your router, which ties an address to the server's network card, or
- A static address on the server itself, which is what I did.
RHEL 10 manages networking with NetworkManager, and the old /etc/sysconfig/network-scripts/ifcfg-* files are gone. RHEL 9 had deprecated them, and RHEL 10 removed support entirely. Older guides that edit those files won't work. Use nmcli instead:
# List connection profiles and find yours
nmcli connection show

# Set a fixed address, gateway and DNS servers
sudo nmcli connection modify "<connection-name>" \
  ipv4.method manual \
  ipv4.addresses 192.168.10.20/24 \
  ipv4.gateway 192.168.10.1 \
  ipv4.dns "192.168.10.1 8.8.8.8"

# Apply it
sudo nmcli connection up "<connection-name>"
Choose an address outside the range your router hands out over DHCP. Otherwise two devices can end up with the same address.
NetworkManager saves the profile as a keyfile in /etc/NetworkManager/system-connections/. Mine contains the same settings:
[ipv4]
method=manual
address1=192.168.10.20/24
dns=192.168.10.1;8.8.8.8;
About Wi-Fi. The NUC is on Wi-Fi for now. That works for SSH and Cockpit, but you generally can't bridge virtual machines onto your home network through a Wi-Fi client connection. So the VMs will sit on a private NAT network inside the server. The 2.5 GbE port is the better long-term option.
Step 5: Go Headless With SSH
Once SSH works, the server no longer needs a monitor or keyboard. Create the key on the laptop you connect from. My first mistake was running ssh-keygen inside an SSH session, which created the key on the server instead.
# On your laptop
ssh-keygen -t ed25519 -C "[email protected]"
ssh-copy-id -i ~/.ssh/id_ed25519.pub <user>@192.168.10.20
ssh <user>@192.168.10.20
ssh-copy-id asks for your password once and installs the public key on the server. After that, you log in with the key.
To skip typing the address, add an entry to ~/.ssh/config on your laptop:
Host rhlab01
    HostName 192.168.10.20
    User <user>
    IdentityFile ~/.ssh/id_ed25519
Now ssh rhlab01 is all you need.
For a browser view, Cockpit came with the Server with GUI install, and the firewall already allows it. Open https://192.168.10.20:9090 and sign in with your Linux account. It shows logs, services, storage, updates and networking, and it can manage virtual machines once the cockpit-machines package is installed.
Finally, I renamed the server so the name says what it is:
sudo hostnamectl set-hostname rhlab01.lab.example.com
A shell that's already open keeps showing the old name in its prompt. Log in again to see the new one.
Step 6: Register With an Activation Key
My first try at registering was the obvious command:
sudo subscription-manager register --username <your-login>
It failed with HTTP error code 401: Unauthorized. Instead of debugging the login, I created an activation key. It registers systems to your Red Hat organization without your personal password, which is what you want for scripts, and for a lab where you'll register a new VM every week.
- Sign in at console.redhat.com and go to Inventory → System Configuration → Activation Keys.
- Create a key. I named mine
rhlaband set Usage to Development/Test. - Find your organization ID. The quickest place is Inventory → Systems → Register systems, which shows a ready-made command with the ID filled in.
Then, on the server:
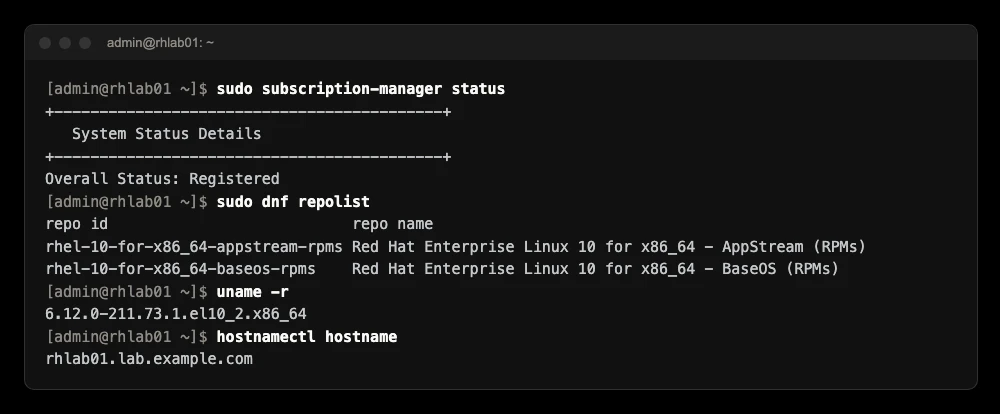
sudo subscription-manager register --org <your-org-id> --activationkey rhlab
sudo dnf repolist
You should see the RHEL 10 BaseOS and AppStream repositories. An empty list means the system isn't registered.
Step 7: Update and Reboot
sudo dnf -y upgrade
sudo dnf needs-restarting -r   # tells you whether a reboot is needed
sudo systemctl reboot
The first update on this machine changed 354 packages, including a new kernel, so I rebooted. The server was back in about 35 seconds with no failed services.
Hardening Checklist: Done and Next
A lab doesn't need production-grade security, but it does sit on my home network. Here's where things stand.
Already in place:
- SSH keys work, so I don't need passwords to log in.
- firewalld allows only SSH, Cockpit and the DHCPv6 client.
- SELinux is in enforcing mode, the RHEL default. Leave it on.
- Secure Boot is on.
- The server is registered and fully updated.
- The clock is synced with NTP.
Next:
-
Turn off SSH password logins. Do this only after you've confirmed key login works. In RHEL, SSH reads the files in
/etc/ssh/sshd_config.d/in name order, and the first value it finds for a setting wins. RHEL ships its own settings in50-redhat.conf, so give your file a lower number:echo "PasswordAuthentication no" | sudo tee /etc/ssh/sshd_config.d/30-no-passwords.conf sudo sshd -t && sudo systemctl reload sshdKeep your current session open, and test a new login before you close it.
-
Boot to text mode. The server never has a screen attached, so there's no point starting the desktop:
sudo systemctl set-default multi-user.target -
Install security updates automatically with
dnf-automatic. In/etc/dnf/automatic.conf, setupgrade_type = securityandapply_updates = yes:sudo dnf install -y dnf-automatic sudo systemctl enable --now dnf-automatic.timer -
Fix the time zone:
sudo timedatectl set-timezone America/Edmonton. -
Check IPv6. The server picked up a public IPv6 address from my internet provider. firewalld still filters it, but make sure your router isn't allowing incoming IPv6 connections you didn't intend.
-
Tighten passwordless sudo. I gave my lab user passwordless sudo so that automation can run unattended. That's fine on a lab box. On anything else, limit it to the commands automation actually needs.
What's Next
This is the first post in a series. Each of the next ones covers one stage of the lab:
- Cockpit and KVM: virtual machine storage on
/home, a NAT network, and managing VMs in the browser withcockpit-machines. - Ansible Automation Platform: installing AAP in a VM and automating patching for a few RHEL test servers.
- OpenShift: deploying Single Node OpenShift, and practising node drains and upgrades.
- Azure Red Hat OpenShift: the same OpenShift in the cloud, as a managed service. Microsoft describes Azure Red Hat OpenShift as jointly engineered, operated and supported by Red Hat and Microsoft, with patching and updates handled for you. I'll compare running OpenShift yourself with handing the platform work to the service.
The goal is a patch run with no manual steps: stop the app, patch, reboot, start the app, and check it's healthy.
If your team runs RHEL on premises and patching still eats a long maintenance window, I'd like to hear how you do it today. See how we work with Red Hat and Azure, or book a discovery call.
Kevin Evans
 Founder, Code To Cloud Inc.
Kevin Evans leads agentic DevOps and application modernization engagements for enterprise and mid-market teams, and offers fractional CTO advisory to growing businesses. He spent nearly five years at Microsoft, rising to Senior Solutions Engineer, and is a Microsoft MVP for Azure, a CNCF Ambassador and Calgary chapter lead, based in Calgary, Alberta. More about Kevin
Frequently Asked Questions
Can you use Rufus to make a RHEL 10 installation USB?
Yes. Rufus writes the RHEL ISO to a USB stick on Windows. Red Hat's own documentation recommends Fedora Media Writer, which is a community tool that Red Hat does not support. If a USB made with a third-party tool boots but the installer can't find its own packages, Red Hat's documented fixes are to rewrite the stick in Rufus's DD image mode, or to change inst.stage2= to inst.repo= at the boot menu.
How do you set a static IP address on RHEL 10?
Use nmcli to change the NetworkManager connection profile: set ipv4.method to manual, then set ipv4.addresses, ipv4.gateway and ipv4.dns, and bring the connection up again. RHEL 10 no longer supports the old ifcfg network files, so NetworkManager stores the profile as a keyfile in /etc/NetworkManager/system-connections/.
Is Red Hat Enterprise Linux free for a home lab?
Yes. The Red Hat Developer Subscription for Individuals is free. It covers up to 16 physical or virtual systems, is self-supported, and lasts one year. You renew it each year, from 30 days before it expires. It is for individuals, not companies.
Why register RHEL with an activation key instead of a username and password?
An activation key registers a system to your Red Hat organization without your personal password. It suits scripts, works for every virtual machine in a lab, and can be deleted at any time without touching your account.
